YLogLite
OTP Mechanism on orderApril 23rd, 2021
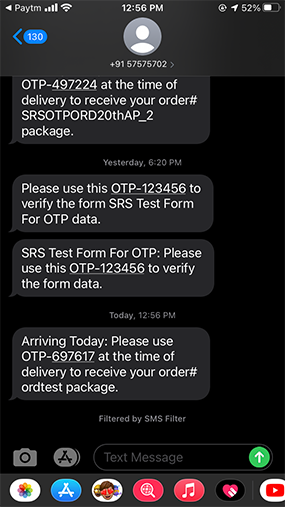
This mechanism will provide a delivery man to confirm or authenticate the end user’s Order. When the order is Out For Delivery(IN-TRANSIT STATE) then one SMS with OTP will be sent on the customer mobile number (customer/contact/both based on admin profile). This OTP will verify when sales people deliver orders and ask for OTP (Only ask when Order POD OTP Required profile value is Yes for driver).
Objectives and Steps
User can have the option to authenticate the ORDER delivery for the Dispatch
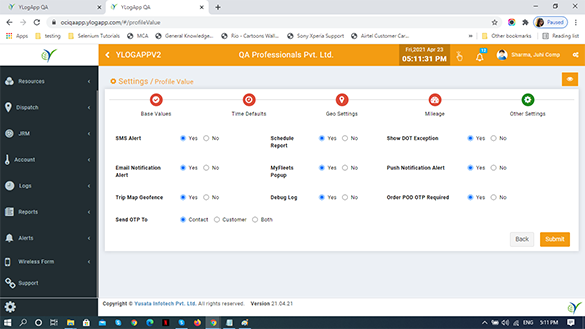
Steps to enable setting for OTP Mechanism for Orders Deliveries
1. Login to the portal with Customer/Contact/Company
2. Go to settings from the bottom of the side menu
3. Click on the option Profile Values
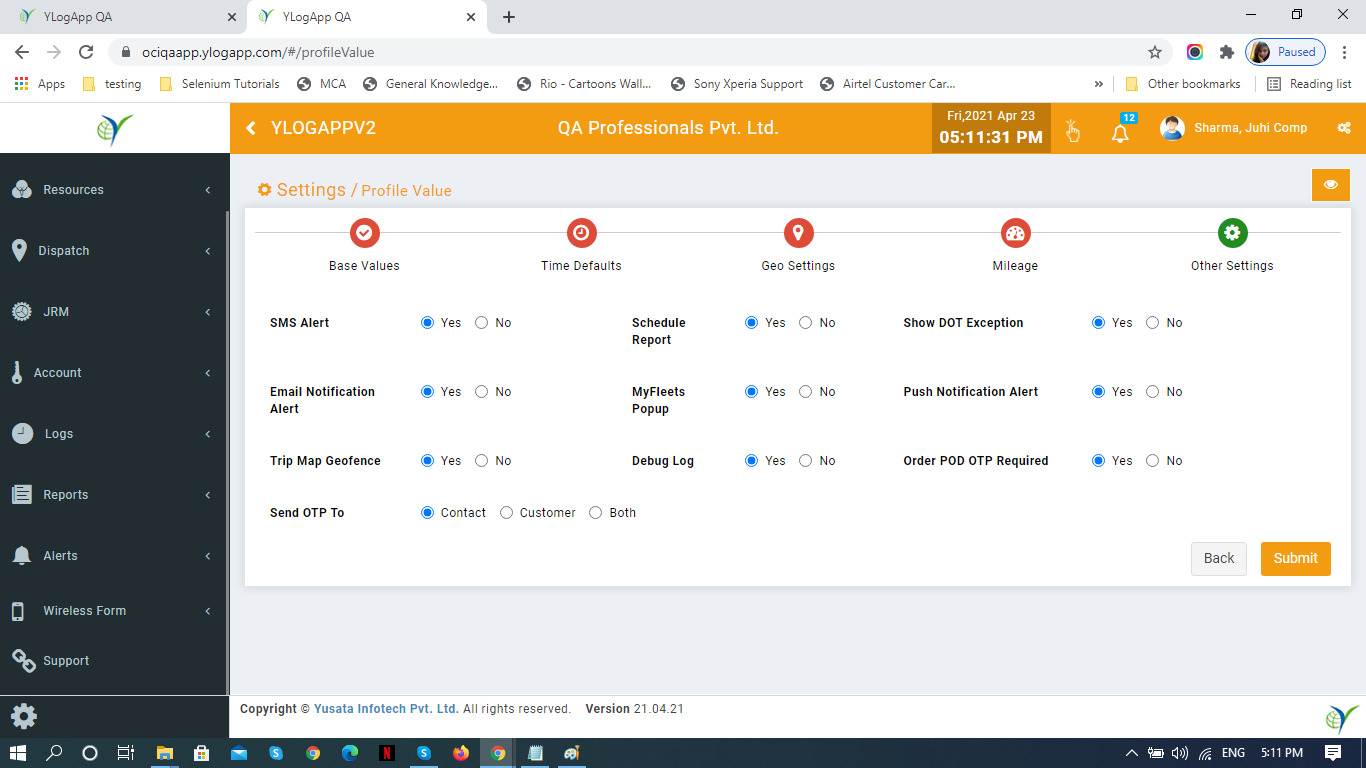
4. Select the tab Other settings
5. Here user will have two options
a) Order POD OTP Required - user can select only one option (set in driver login for reflection in app)
• Yes/No
b) Send OTP To (Options) user can select only one option
• Contact
• Customer
• Both
Note : If the user wants to enable the mechanism then the user must have selected option Yes for Order POD OTP Required. And in mobile app in
the setting if set no then the OTP field will not come and if set yes then OTP field will come in Mobile app
Settings Profile Value
Settings OTP
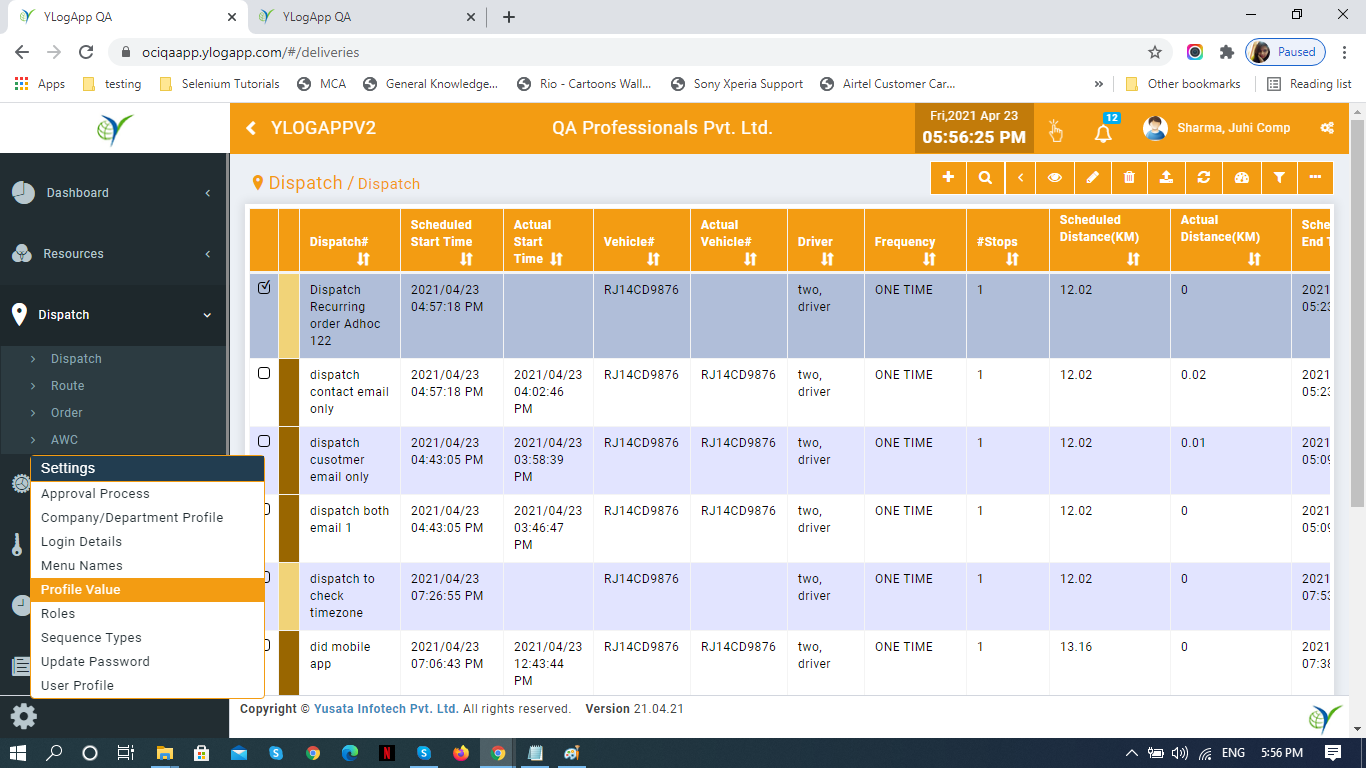
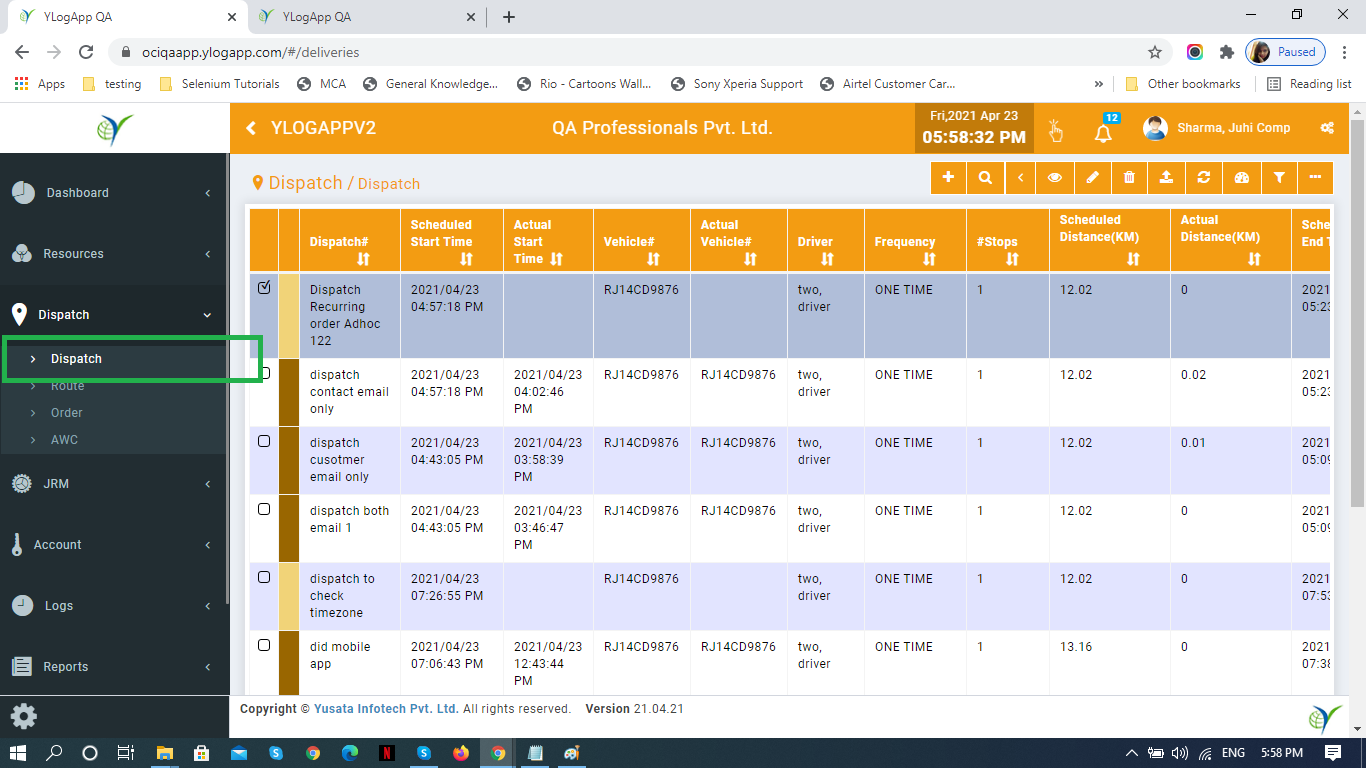
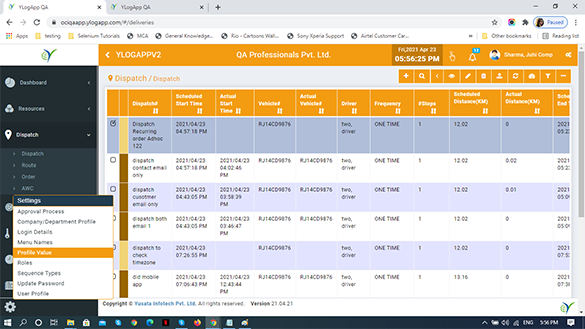
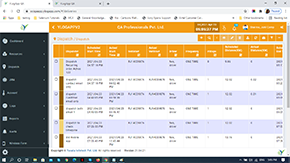
Steps to create Dispatch
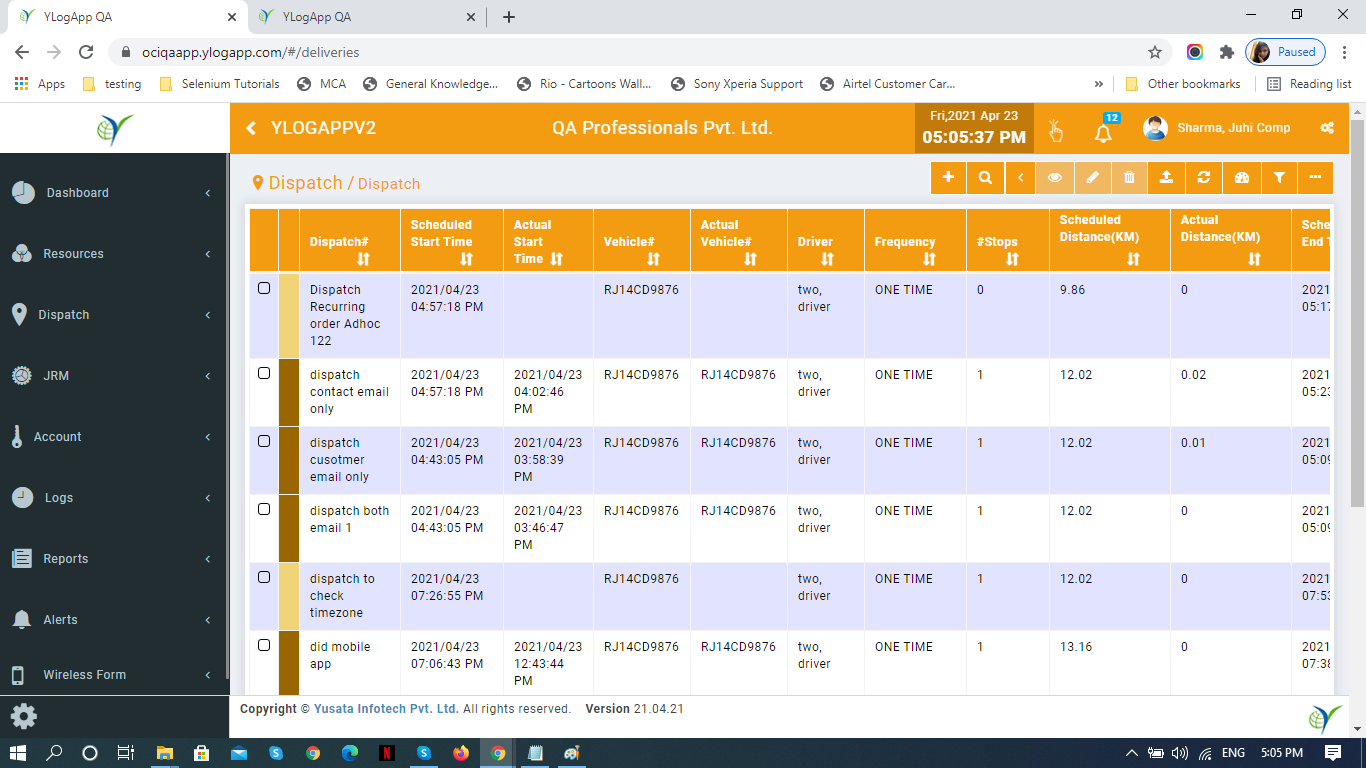
1. Login to the portal with user who can create the Dispatch
2. Click on the side menu
3. Select and click on the menu option - Dispatch
4. Select and click on the sub menu option - Dispatch
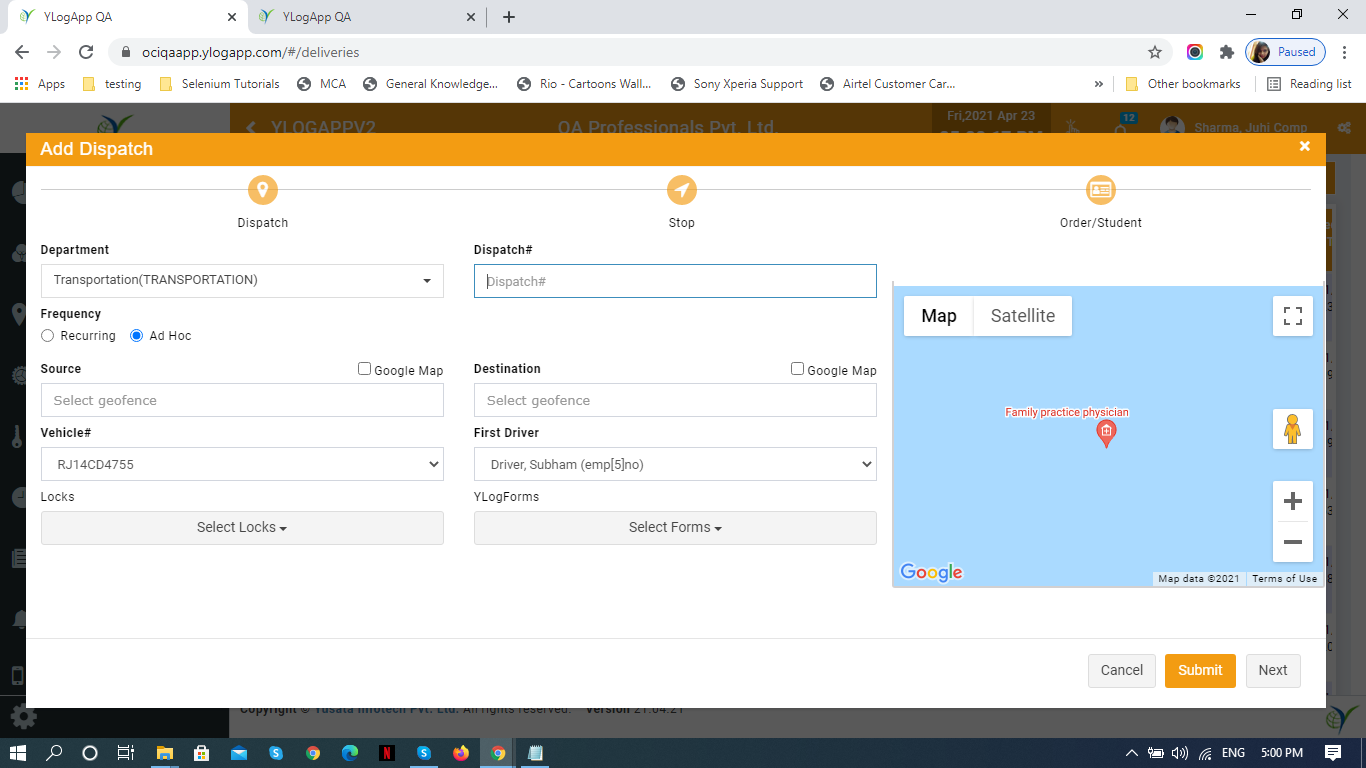
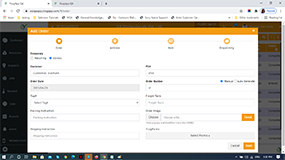
5. Create Dispatch (Recurring or Ad Hoc/ OneTime)
a) Click on the Plus Icon on the top of the grid to add a dispatch
b) Selec the dispatch type (Recurring/Adhoc)
c) Enter the field values as required (All mandatory fields)
• Dispatch Name
• Frequency
• Source
• Destination
• Start / End Date and Time
• Vehicle
• Driver
• If required to fill the form then user can select the respective form from the dropdown list
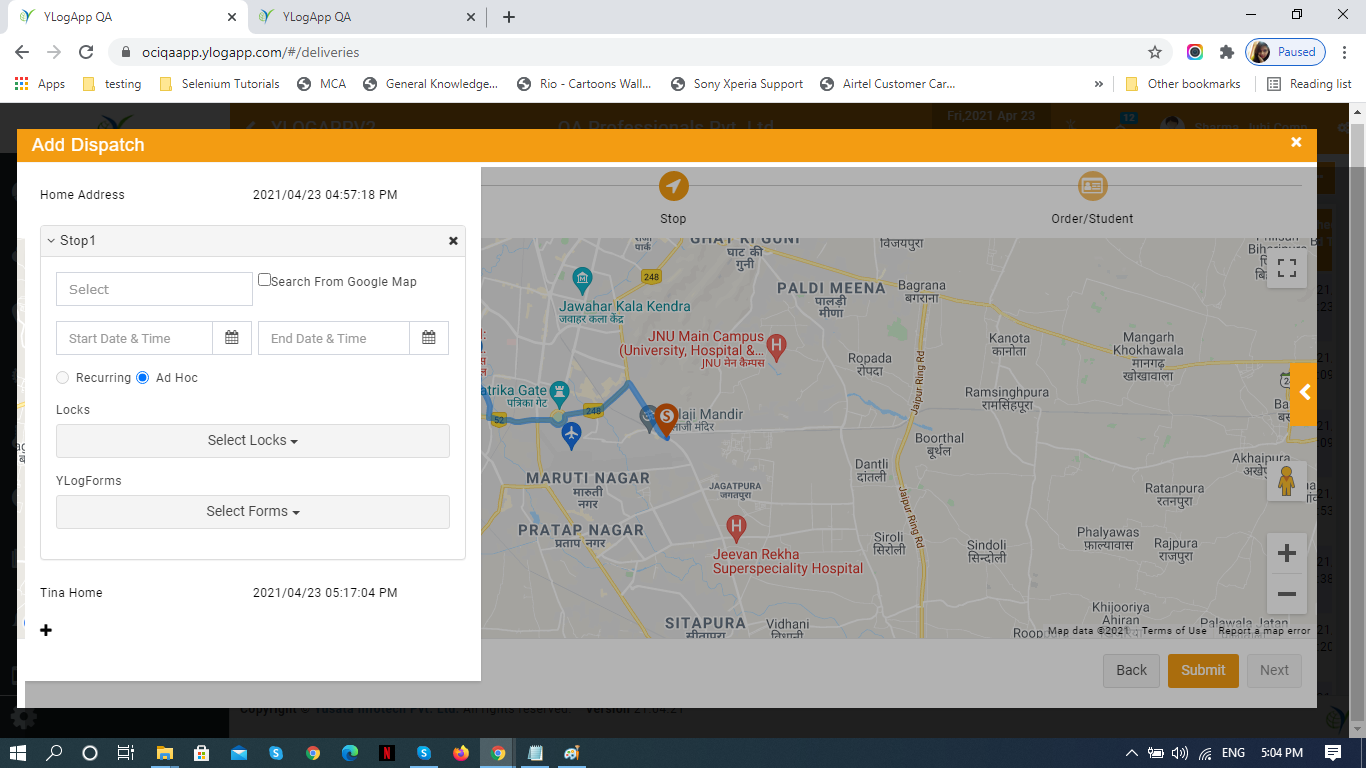
d) Click on Next button
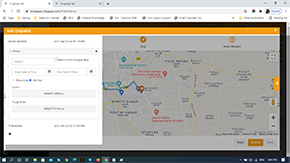
• Add Stop
• Stop Geofence Name (user can select the address from already added geofences or can select the option to add the address from google map)
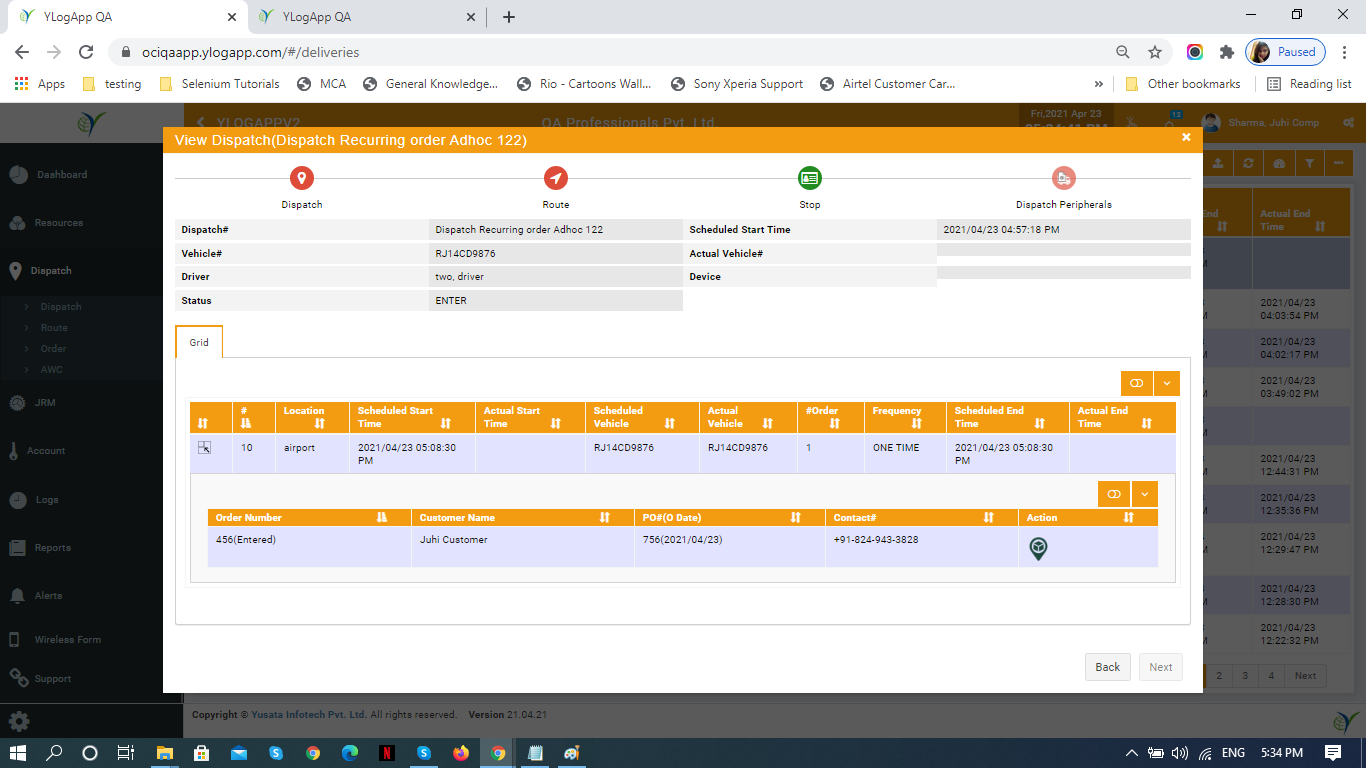
Dispatch
Add Dispatch

Add Stop
Dispatch added in the list
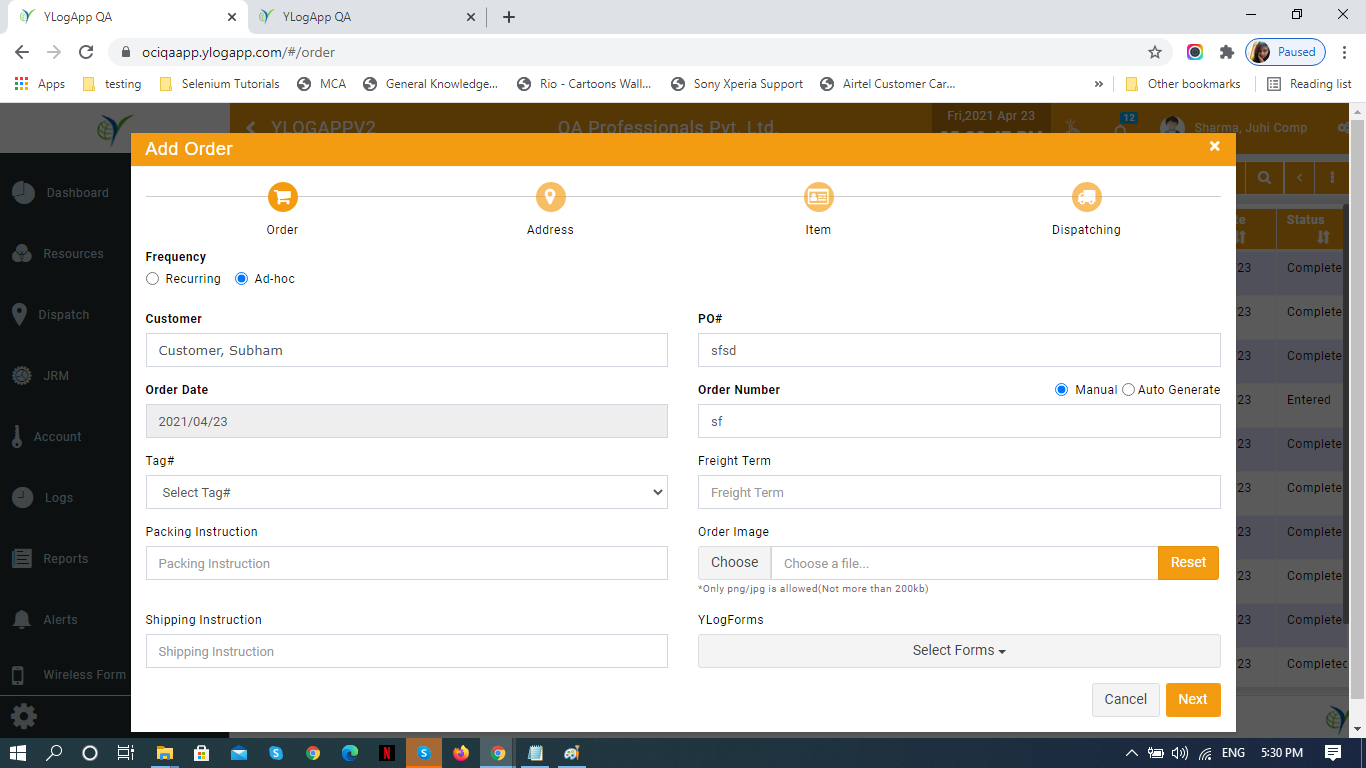
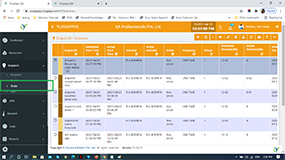
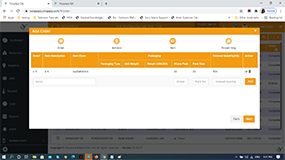
Steps to create order
1. Login to the portal with user who can create the Dispatch an Orders
2. Click on the side menu click on the menu option - Dispatch
3. Select and click on the sub menu option - Order
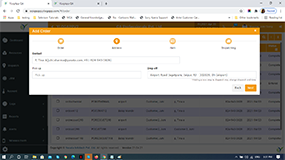
4. Click on Plus icon to add the Order
5. User should have a popup enabled on the screen “Add Order”
Order Name
Frequency (Recurring/ Adhoc)
Order Start/ End Date and Time
Customer Name
PO
Order Number
Other fields as require
6. Click on next button
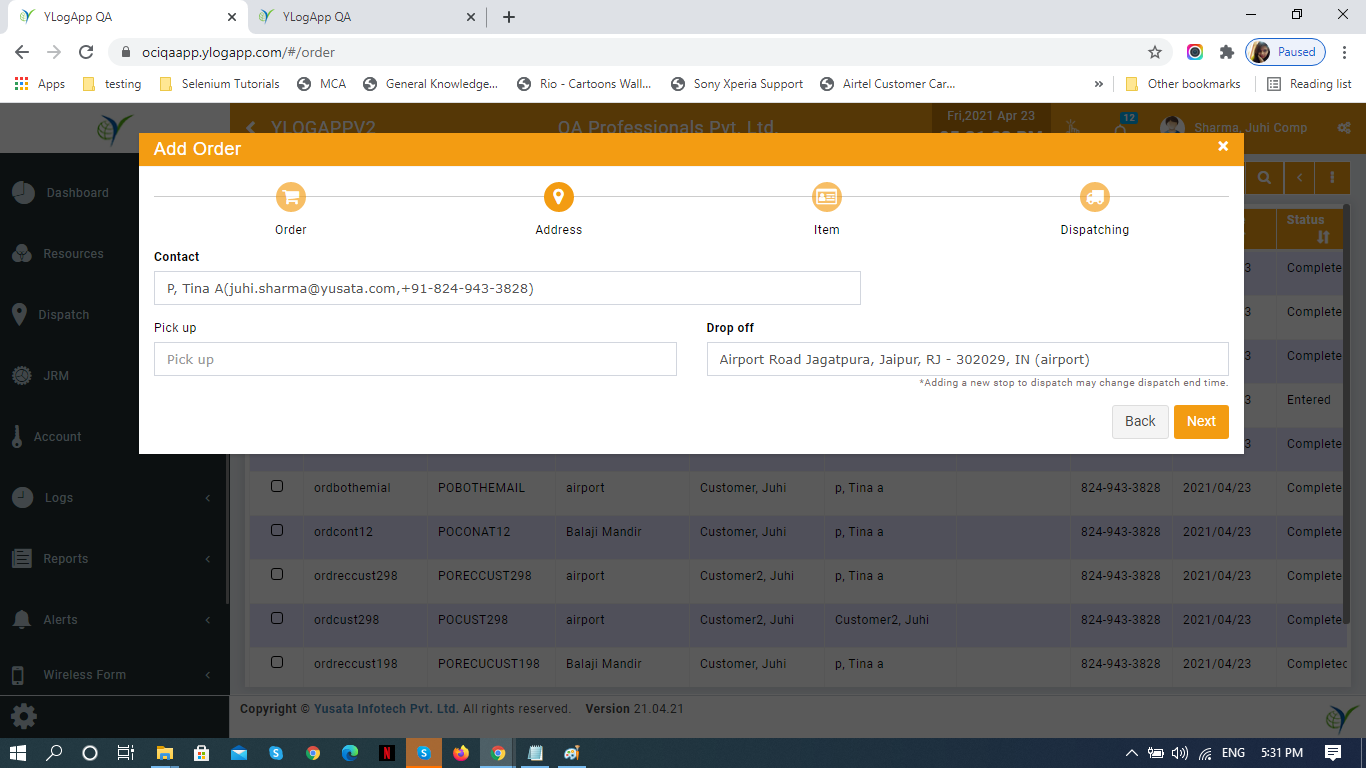
Add Contact
Add Drop Address
Click on Next button
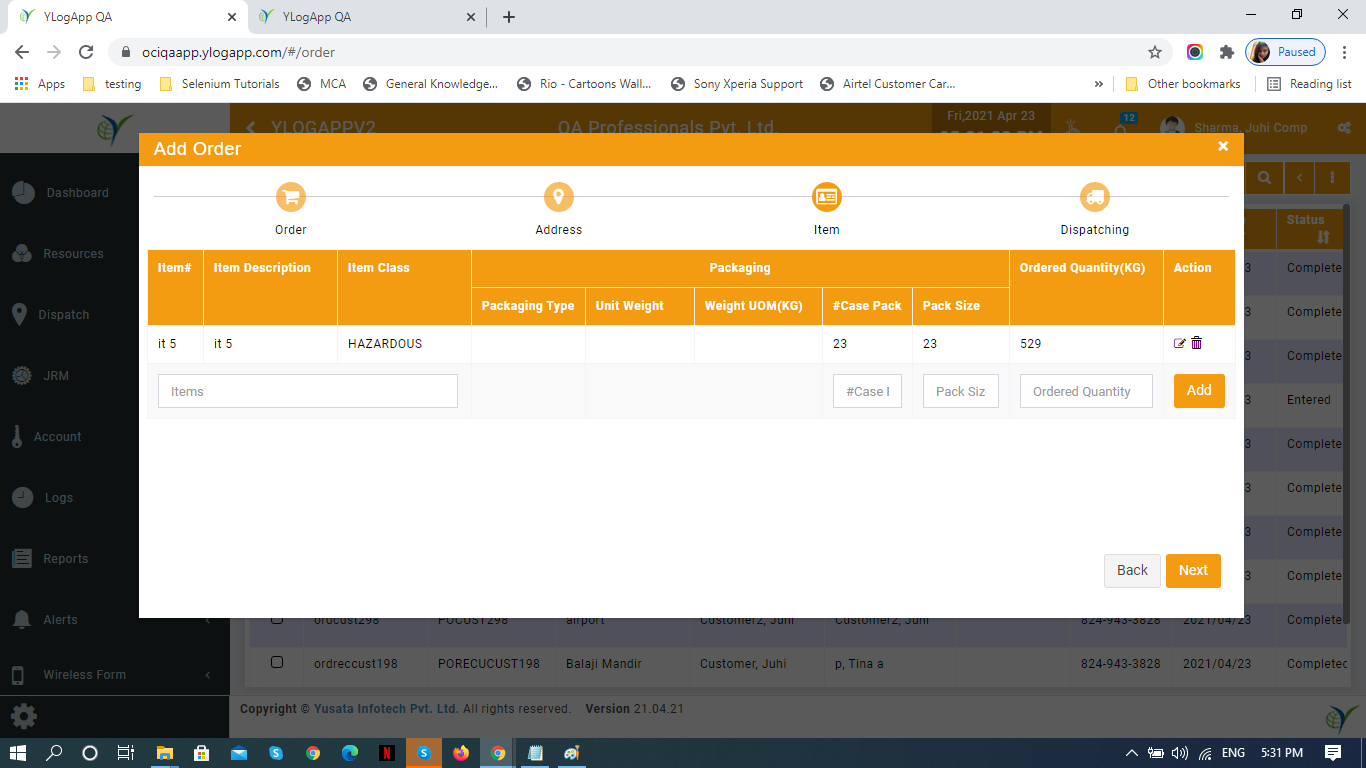
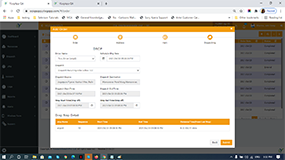
7. Add Items which need to be delivered with the order
Add Item name
Case Pack
Pack Size
Order Quantity
Click on Add button to add the item in the order list
8. Click on next button
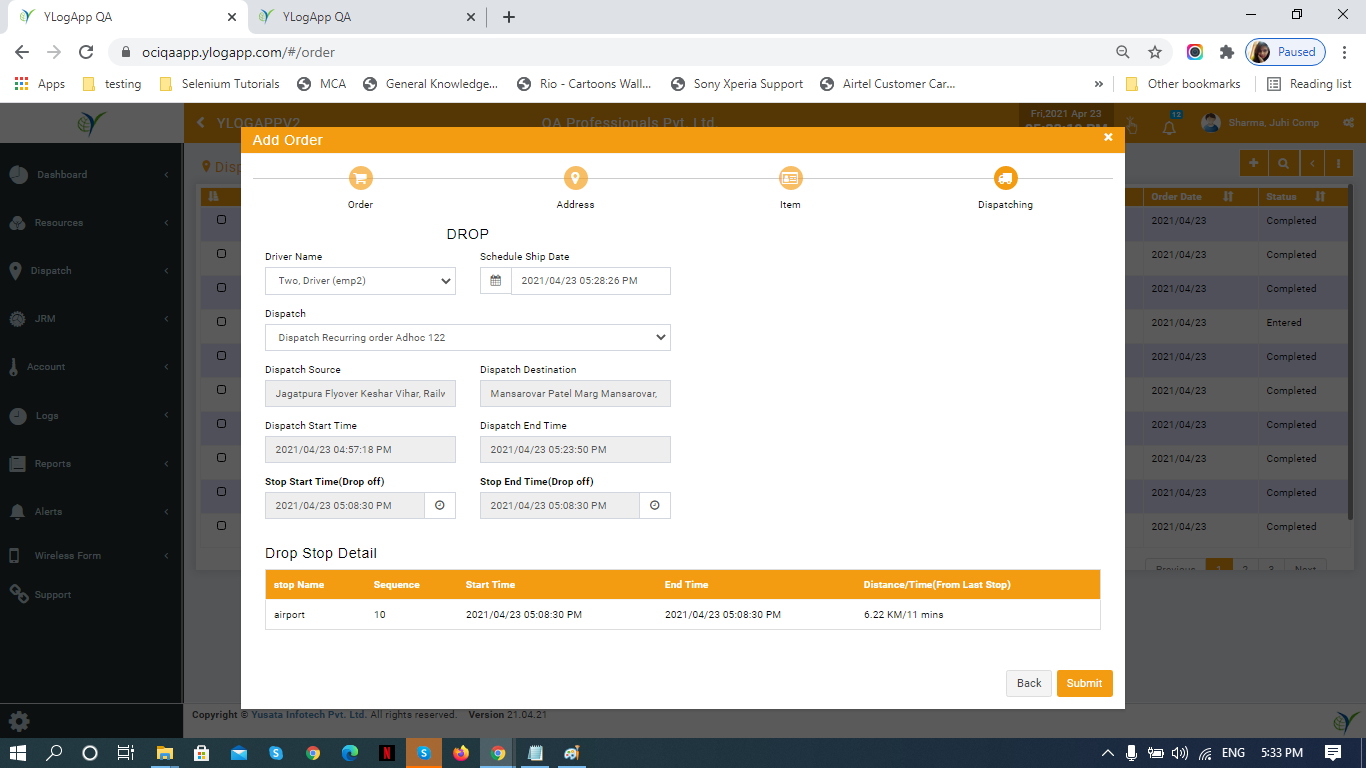
Add the Dispatching Details
Driver Name
Dispatch from the list created before
Click on the submit button.
9. Add the Dispatching Details
Driver Name
Dispatch from the list created before
Click on the submit button.
Note : If the user wants to add the order to dispatch then add the drop address same as the stop address created while adding the dispatch.
Order
Add Order
Add Drop Address for Order
Add Items to the Order
Add Dispatching Details for Order
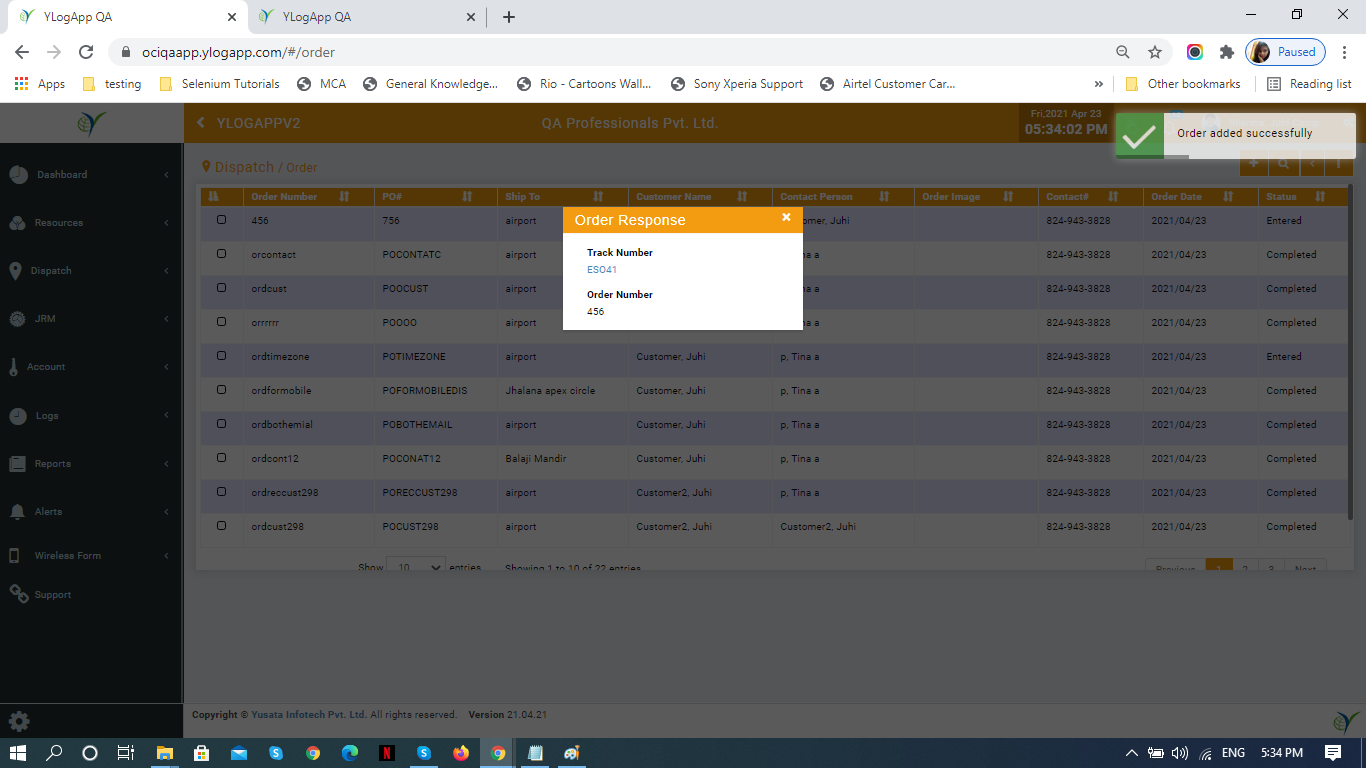
Order added successfully
Order added to dispatch
Validate the OTP received by Customer/Contact/ Both in Driver Login (YLogLite App)
1. Login to the app with driver user credentials
2. Go to Dispatch
3. Start the dispatch (Status will be In-Transit)
4. An OTP will be received by Customer/Contact/Both (as selected in the settings on portal) (Verify the setting in Customer and Contact login)
Note: Default settings will be enabled as per the company settings.
Note : OTP field availability in dirver login depends on the setting Send OTP Yes/No in driver login.
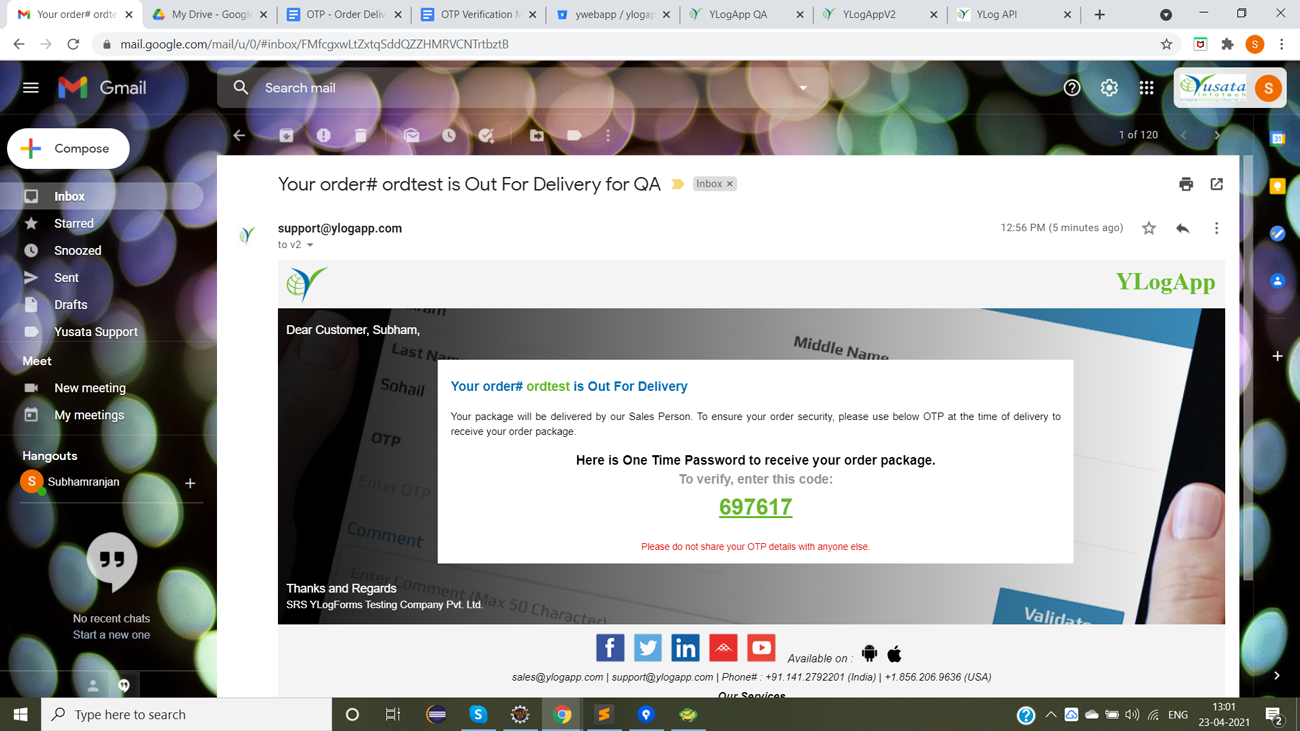
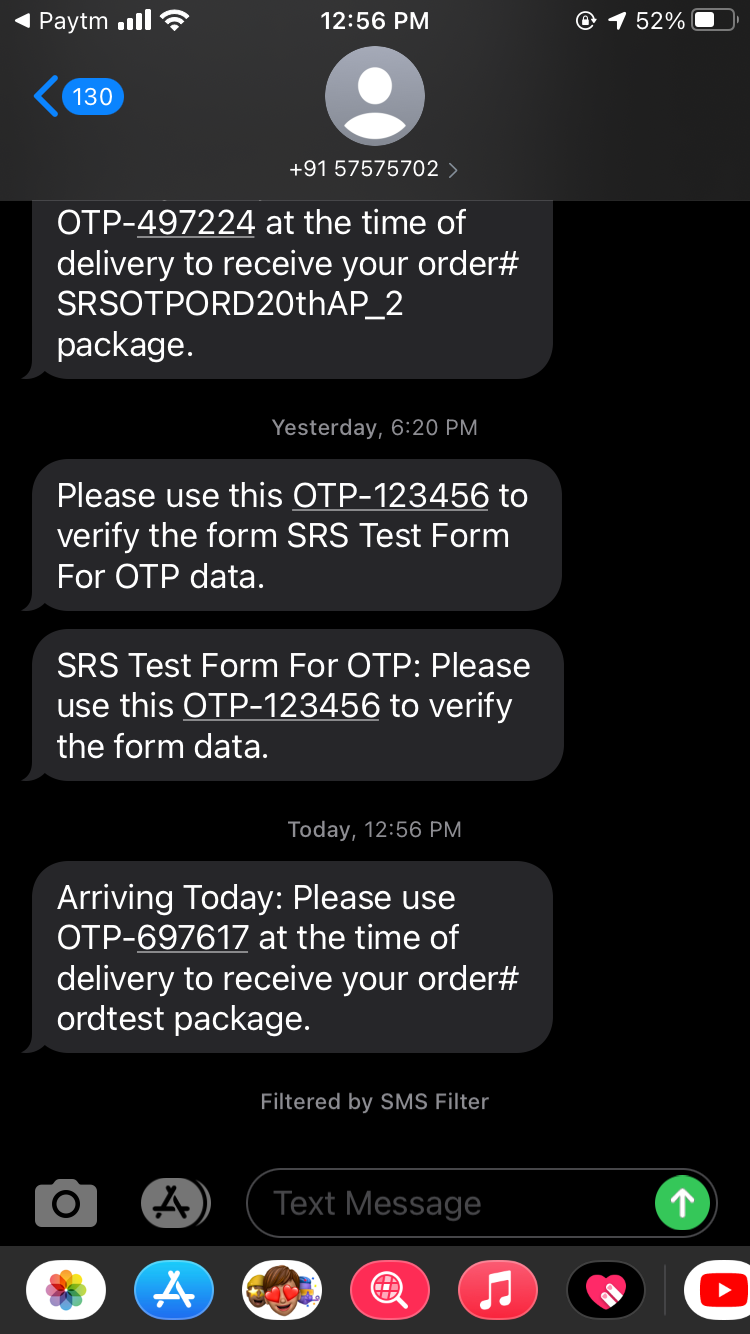
5. OTP will be received on Email and SMS (as enabled settings)
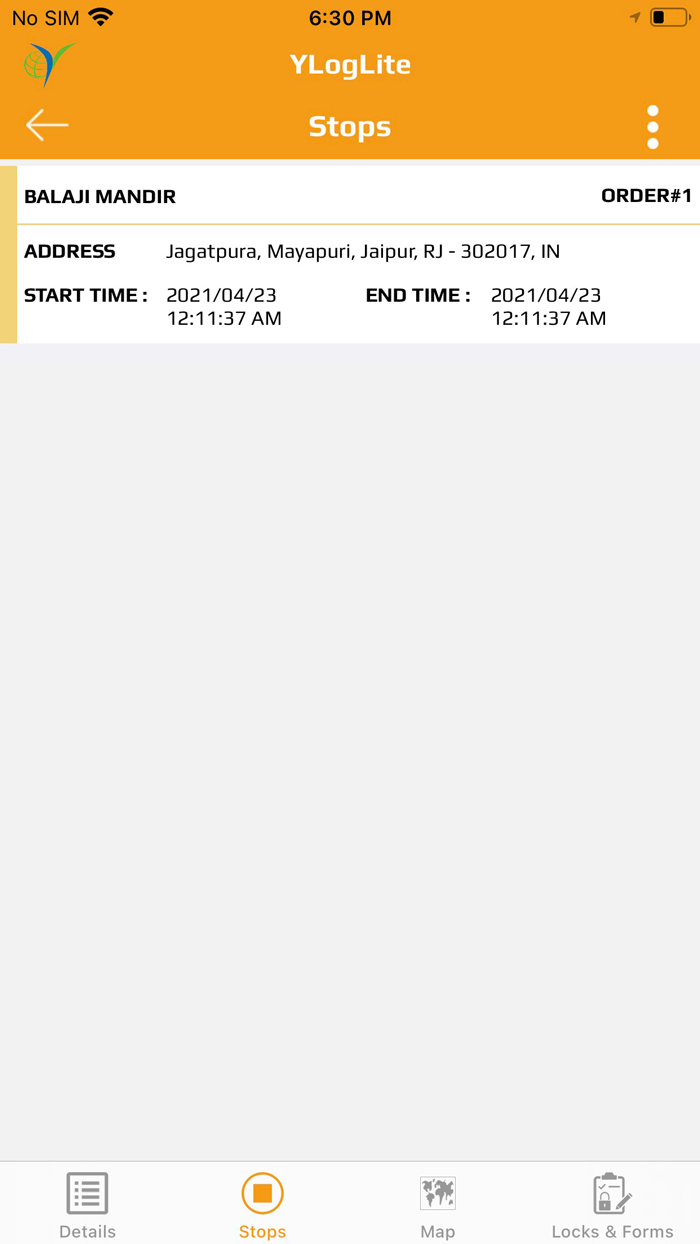
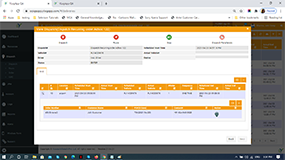
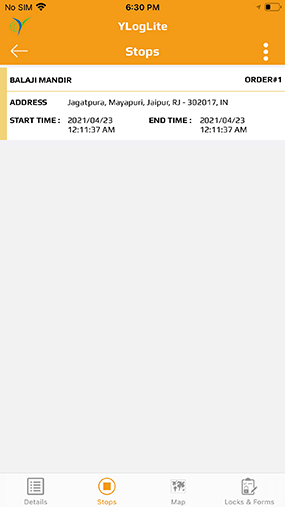
6. Go to Stops
7. Click on the Stop
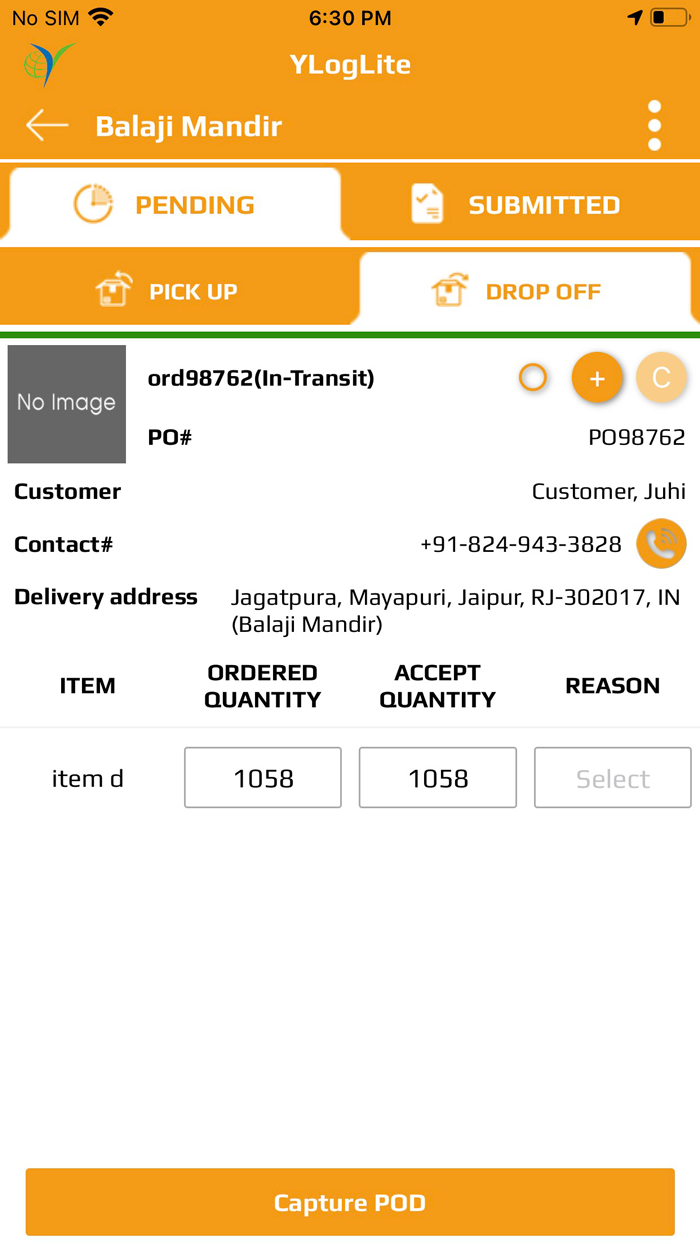
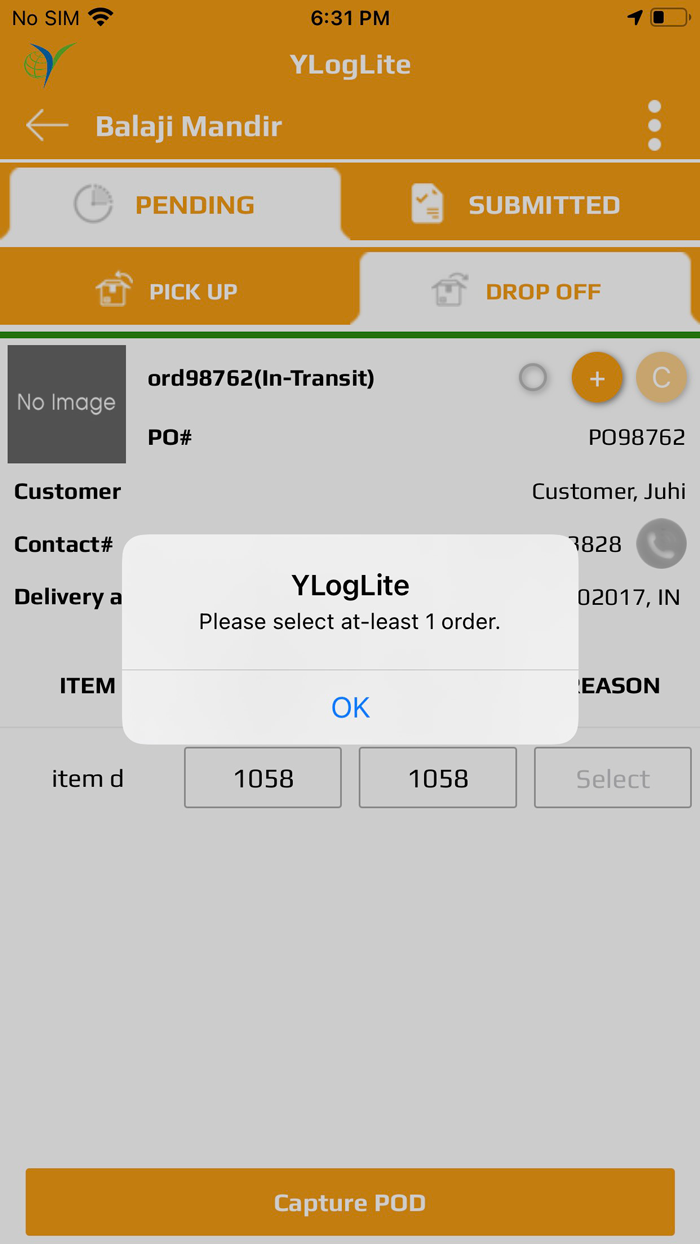
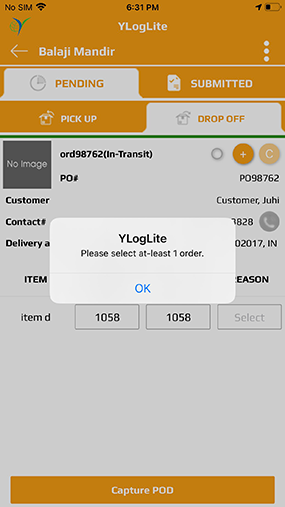
8. Click on Capture POD button (only enabled once the dispatch is started)
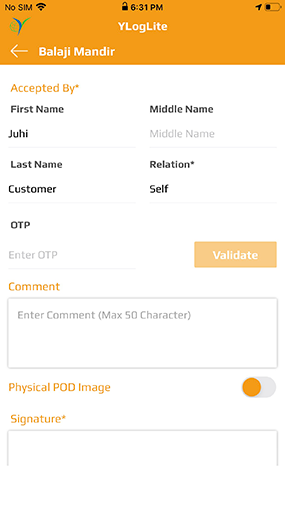
9. Here user will have the order details with OTP validation text field and validate button
10. Enter otp click on validate button
11. User will have submit enabled on the bottom of the screen
12. Enter Comment
13. Upload Picture of POD
14. Enter digital signature
15. Click on Submit button
16. Order status will be completed
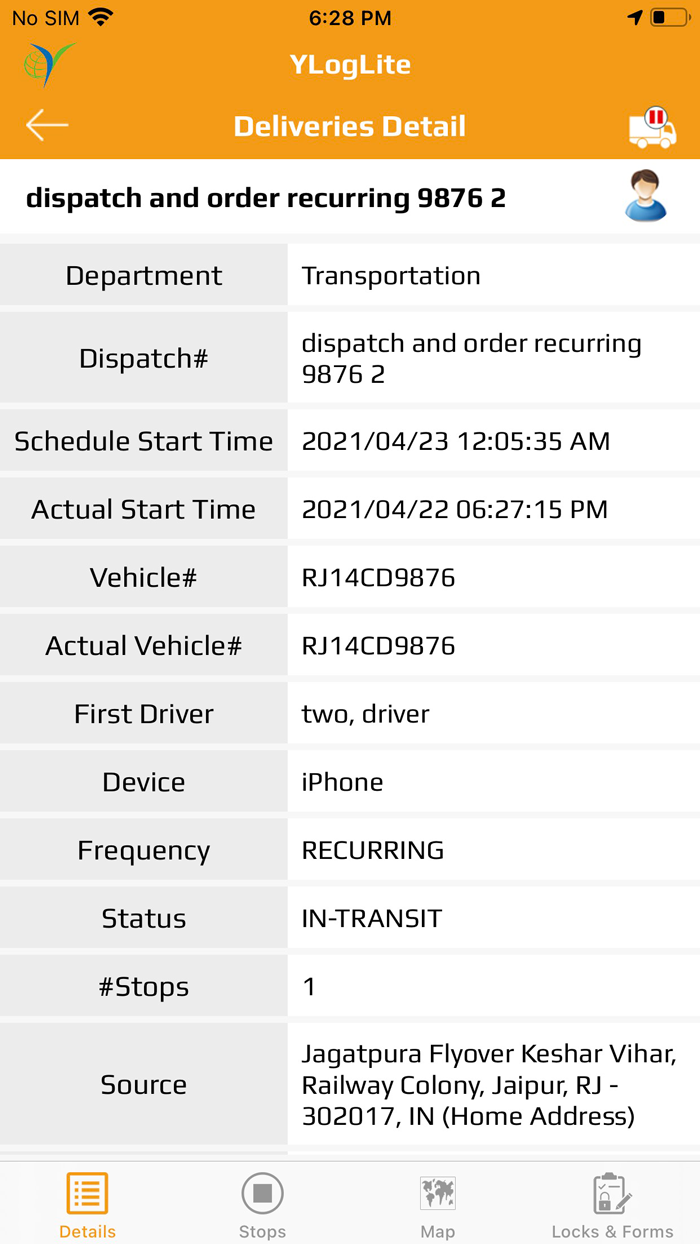
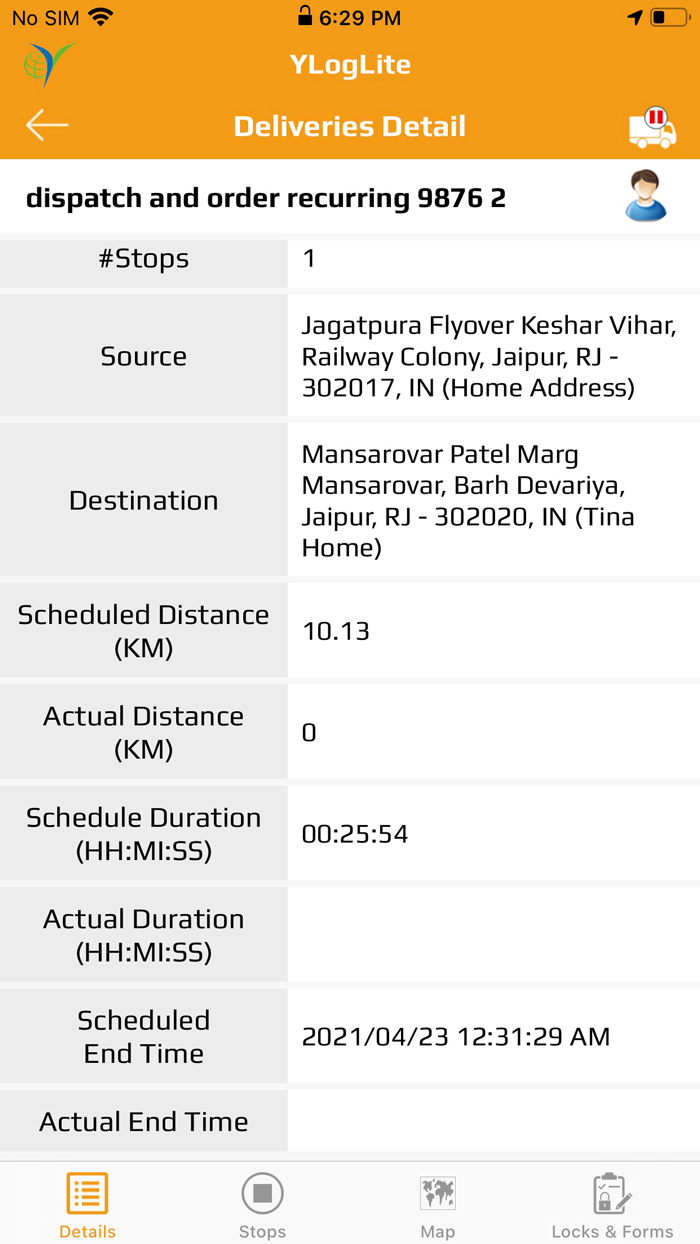
Dispatch Detail

Dispatch Started

Stop with 1 Order
Order Details

Capture POD without selecting Order
Validate OTP screen
Order OTP Email Template
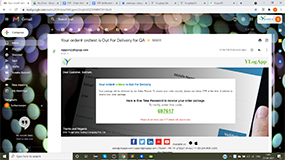
Order OTP SMS